

Lighting and exposure
Set your light direction first, establish a readable exposure, then tune each material. This makes it easier to see which adjustment changed the shot.
Shape the day and night sides
Section titled “Shape the day and night sides”- Start with one active Directional Light. Rotate it to move the illuminated hemisphere. For a crescent, move the lit side toward the far edge of the globe. Keep a sliver of daylight in frame to judge the transition.
- Use the light’s color and Intensity to shape HDRP Lit surfaces. In the Quick Start, the light is white and intensity is in lux. Keep the unit consistent when comparing scenes.
- With Use Point Light off, the Atmosphere material uses the Directional Light’s direction. Set the limb’s color and brightness on the material itself. If the day side looks right but the rim is too bright, adjust the shell.
If a Directional Light from below leaves a Lit surface unexpectedly dark with Fog enabled, apply the HDRP project configuration before raising the light intensity or changing Exposure. HDRP applies this setting to direct illumination. The atmosphere material still takes its glow direction from the light it selects.
Set the camera’s exposure
Section titled “Set the camera’s exposure”- Select the active Volume and open its Profile. Make sure the Volume is enabled and on a layer included in the camera’s Environment > Volume Mask. For a local Volume, check that the camera or its Volume Anchor Override is inside the Volume bounds.
- In Exposure, enable the Mode override and choose Fixed when comparing materials. Enable Fixed Exposure and adjust EV100 in small steps. A higher EV darkens the view. A lower EV brightens it.
- In Tonemapping, enable the Mode override and choose ACES for the guide’s starting look. It shapes the way HDR colors and bright highlights fit the display range. Leave it fixed when comparing colors.
- Use Bloom to control how bright areas spread into a halo. Lower Intensity if corona, magma or flashes lose detail in a wide glow. Increase it gradually when the emitter is already visible.
Automatic and Automatic Histogram Exposure adapt to the framing. That works well for moving shots, while Fixed gives you a stable comparison. If an override has no visible effect, check its checkbox, the Volume priority and weight, and the camera’s Exposure and post-processing frame settings.
Start with direct light
Section titled “Start with direct light”To match the Quick Start reference in a scene that already has sky or fog, use the exercise’s Global Volume. Add Visual Environment and override Sky type to None. Add Fog and use its State override to turn fog off in this scene. If the template still adds ambient or reflection fill, add Lighting > Indirect Lighting Controller and override Indirect Diffuse Lighting Multiplier and Reflection Lighting Multiplier to 0 for this comparison.
Add sky and fill
Section titled “Add sky and fill”Start from an authored demo when you want its sky, ambient light and reflections. In a custom scene, Visual Environment and the matching sky override set the sky. HDRP’s ambient and reflection sources can add fill and highlights to Lit planets, including parts of the dark side. Use HDRI Sky when you want an HDR environment. Check fog in the active Volume if it is flattening contrast or dimming the scene.
Compare with Demo 01
Section titled “Compare with Demo 01”Use the supplied camera, lights and Volume Profile together with the HDRP project configuration. Keep Fog enabled and let automatic exposure settle.
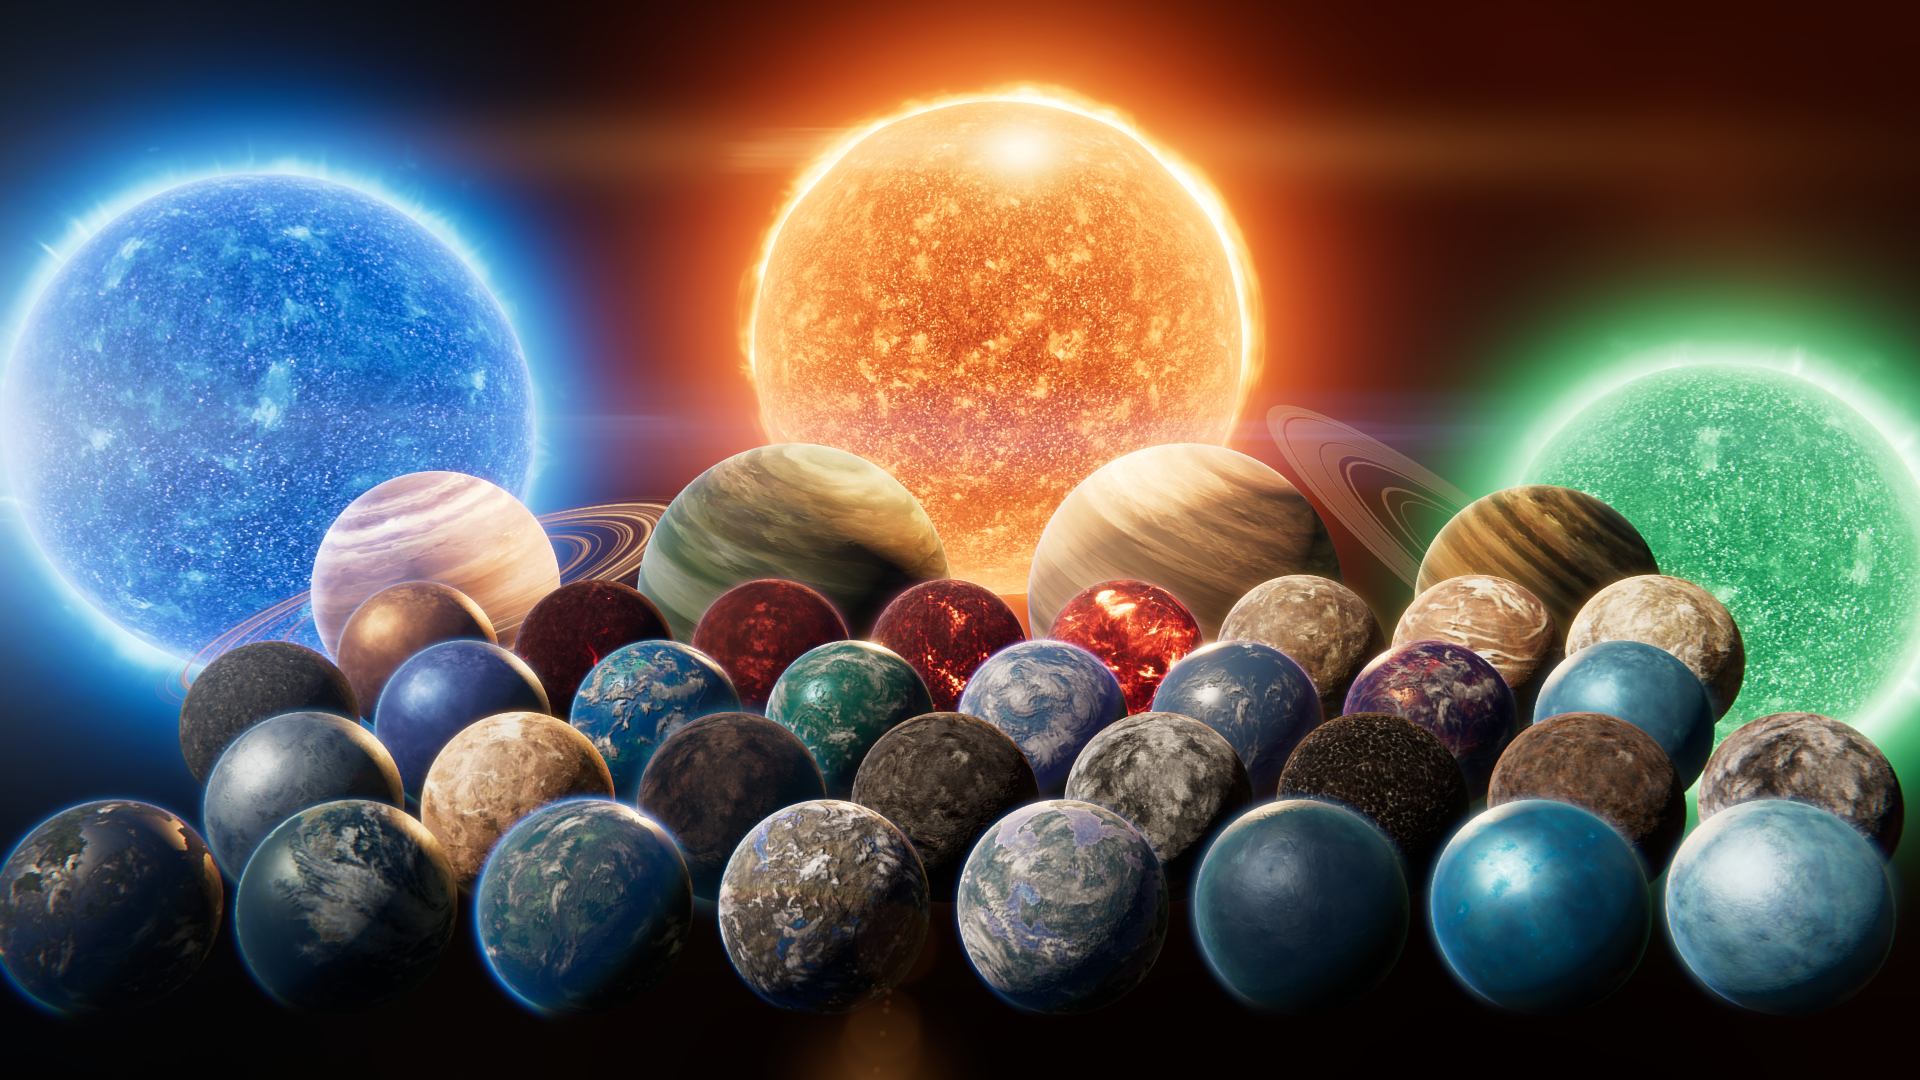
PlanetsDemoscene_01 after applying the HDRP configuration. Look for surface detail on the foreground worlds and warm bands on the gas giants. View Demo 01 at full size
Choose the right control
Section titled “Choose the right control”| If you want to change | Adjust |
|---|---|
| The direction or intensity of illumination on a planet | A Unity Light component |
| The strength or color of the atmospheric rim | The shell material’s light_intensity, Ray and Mie |
| The color or strength of a hot fissure, star or flash | The relevant material’s emission controls |
| The brightness or highlight roll-off of the entire shot | Exposure and Tonemapping in the camera’s effective Volume |
| The spread of a bright halo | Bloom in the Volume |
A Sun prefab gives you the visible star. Add a Unity Light to illuminate other objects. See Troubleshooting for dark, blown-out or missing effects.